@SpartanWX
> Cost? Experience required to cobble this together? Sounds intriguing.
So far less than $100, as promised, but you have to be experienced with the soldering iron and circuit construction. Yes, intriguing because these XBee devices are really amazing: postage-stamp sized 2.4GHz modem transceivers that transparently extend serial connections throughout the house!
My 1-milliwatt pair have now been chugging away for about 16 hours now without a hiccup, delivering my VUE station reports to APRS/CWOP.

Here's how I did it. First, the easy part.
Buy a USB EXplorer ($25) and a 1mw XBee ($22) from SparkFun, plug it into your destination computer, configure it, and you're halfway done! (You can use a higher power unit of course, but more expensive and higher drain on batteries)
http://www.sparkfun.com/products/8687http://www.sparkfun.com/products/8665[You can probably get these slightly cheaper if you shop around, but I just got everything from SF for convenience of the their excellent support]
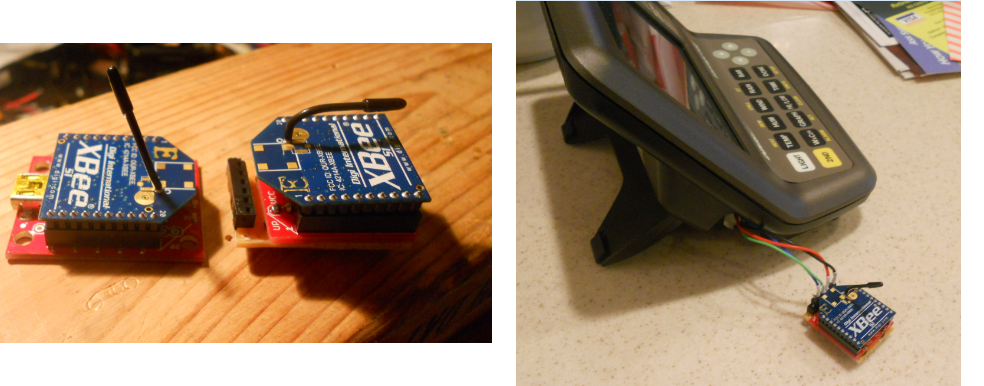
This is what it will look like when it's running. The red/green status lights are nice, green blinks whenever a record is received wirelessly from the VUE console!

Now the console-side transceiver. Good news: it will be cheaper because we'll build it from inexpensive parts, plus another $22 XBee Modem. But it will of course be more difficult to put together. Don't attempt this unless you have a fine-tipped soldering iron and some building experience.
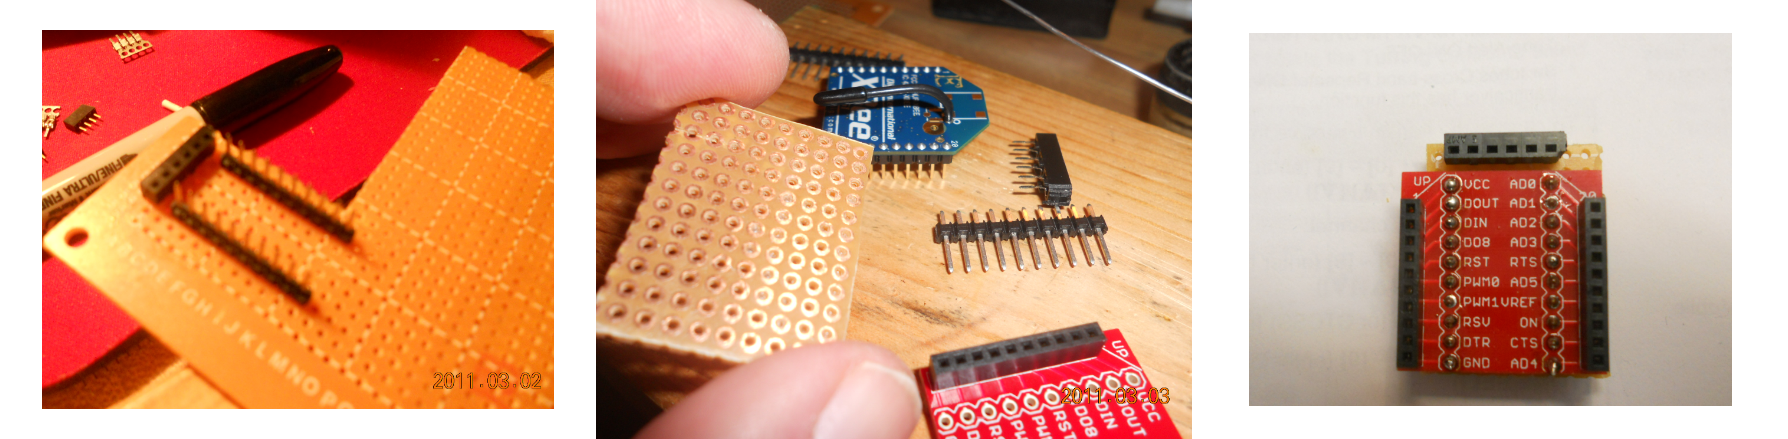
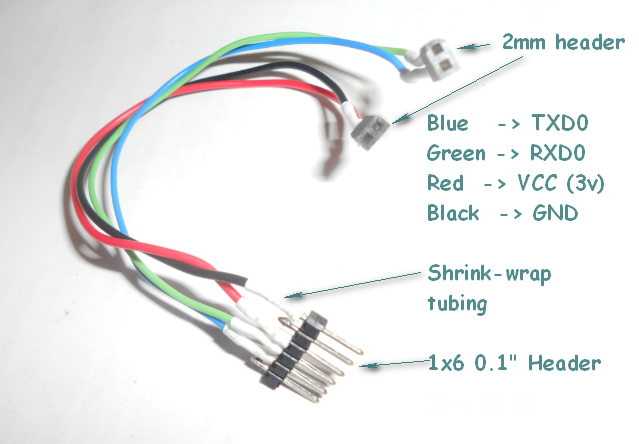
We'll use the SparkFun XBee breakout board ($3) and a pair of 2mm header sockets ($1 each) which need to be soldered to the breakout board for mounting the XBee transceiver ($22, same as above). Buy an extra header socket, which will be cut up to make the console connector cable (details in previous Phase I posting).
http://www.sparkfun.com/products/8276http://www.sparkfun.com/products/10030You'll also need some 0.1" spacing PC board (PCB) and a six-pin 0.1" header for the console connector. I had some of these pieces laying around, but you can get them at SparkFun or Radio Shack. Typically you buy oversized pieces and cut them to size. Shouldn't cost more than a few bucks I would guess.
So here's a Radio Shack PCB which I hacked down to size and mounted the XBee breakout board and the 1x6 header socket for the console connector cable
After laying out the PCB you'll need to flip it over and make the connections from the XBee pins to the console header socket
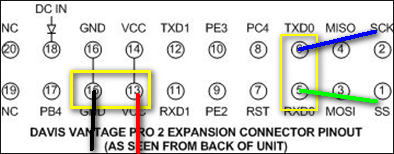
Vcc -> Vcc
Gnd -> GND
Dout -> RXD0
Din <- TXD0
Note that TX _output_ goes to XBee _input_ etc. Most common wiring errors occur here. Also be careful with the soldering iron. It's incredibly easy for solder to "bridge" across pins if you're not careful. Inspect all work with a magnifier before applying power!
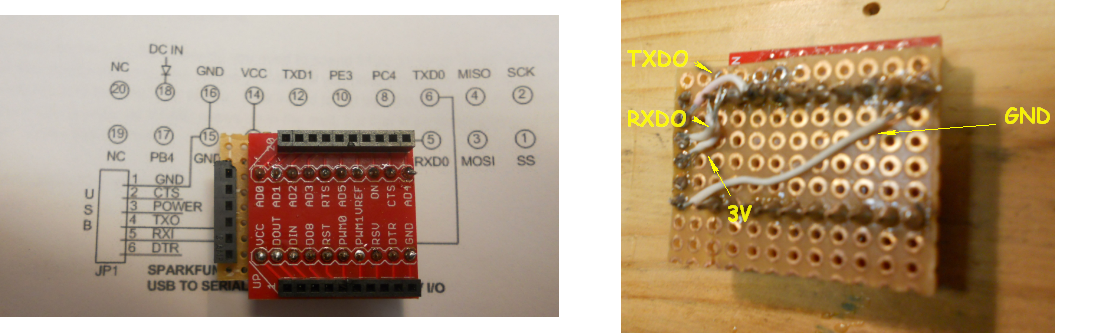
Note that the header socket uses the same ordering from DeKay's original design, so that the same connector cable can be used for both the wired and wireless versions (Phase I and Phase II)
[Have I mentioned that without DeKay's intrepid research, none of this stuff we're doing would be possible? We love you, DeKay!]
The final hardware step is to build the connector cable, essentially the same cable as constructed in Phase I. If you've done this then all you have to do is connect the red wire to the Vcc 3v connection and you're ready to go. (Don't forget the shrink wrap. I'll guarantee short circuits if you don't use it. Cheap to buy (Radio Shack etc) and easy to apply (hair dryer etc)).
The last step is to configure the XBee modems for operation at 19200 baud. The default setting is 9600 baud. Download the excellent X-CTU utility from Digi Corp to do this.
http://www.digi.com/support/kbase/kbaseresultdetl.jsp?kb=125Just plug the XBee's into the USB explorer and run the utility to set baud rate (also you can check out other parameters with this tool).
[added 15-Mar: More detailed XBee instsructions and troubleshooting here:
http://www.instructables.com/id/Changing-Xbee-Baud-Rates/#step1]
Now you have a pair of transceivers. Plug the USB explorer into your destination computer and the homebrew unit into your console using the console connector.
Enjoy!
Next on the agenda, discussions about Phase III, custom PCB for making this available to the masses.
John/af4ex


